A
Summary of the Strategy and Tactics of the Egyptian and Palestine
Campaign With Details Of The 1917-18 Operations Illustrating The Principles Of War
by Lieut. Colonel A. KearseyAldershot: Gale & Polden, n.d. [1935] (with notations by wwi-list members)
[WWI Resource Centre's Dr. M. Geoffrey Miller writes: Turkey mobilised in August 1914 with 15 Divisions and added a further 15 on declaration of war against Great Britain on October 30th. The Turkish Commander, Djemal Pasha, had about 14,000 men between Aleppo and Damascus for operations in Mesopotamia or Egypt. This added to Britain's difficulties in Persia, Egypt and India and to Russia's difficulties in the Caucasus.]
Biography: Alexander Horace Cyril Kearsey, Lieutenant, born 17 December 1877, son of Francis Kearsey, of Burstow Hall, Burstow, Horley, Sussex. He was educated at Rottingdean School, Clifton College, and the Royal Military College, Sandhurst, from which he was commissioned in the York and Lancaster Regiment 7 May 1896. He was promoted Lieutenant 20 June 1900, and took part in the South African War, 1899-1902, being present at the Relief of Ladysmith, including operations of 17 to 24 January 1900 (severely wounded at Venters Spruit, 20 January), and action at Spion Kop; operations of 5 to 7 February 1900, and action at Vaal Kranz; operations on Tucela Heights (14 to 27 February 1900), and action at Pieter's Hill; operations in Natal (March to June 1900), including action at Laing's Nek (6 to 9 June); operations in the Transvaal, May to July 1901; operations in Orange River Colony, December 1901 to 31 May 1902. He was mentioned in Despatches twice (30 March and 9 November 1900), by Sir Redvers Buller, and in the London Gazette of 10 September 1901; and was created a Companion of the Distinguished Service Order [London Gazette, 27 September 1901]: "Alexander Horace Cyril Kearsey, Lieutenant, York and Lancaster Regiment. In recognition of services during the operations in South Africa". The Insignia were presented by the King 14 March 1902. He was promoted Captain 12 March 1904, and was transferred to the 10th Hussars 22 February 1905; was Adjutant in the Territorial Force, April 1908 to March 1911, and graduated at the Staff College, Camberley, at the end of 1914, being promoted Major 11 November 1914. At the outbreak of the European War Major Kearsey was appointed to the Embarkation Staff at Southampton in November, and proceeded to Belgium, attached to the 1st Life Guards, 7th Cavalry Brigade, and was present at the First Battle of Ypres, and Neuve Chapelle. In 1915, he was attached to the Staff of the 7th Cavalry Brigade, and in August of that year was appointed Brigade Major to 1/2nd South-Western Mounted Brigade, and served with them in Gallipoli. He commanded the 5th Dorset Regiment for five months, till May 1916, and was then appointed GS01, with the 54th Division, Egyptian Expeditionary Force, and was present at the First and Second Battles of Gaza. He commanded the 1/5th King's Own Scottish Borderers, May to November 1917, being wounded at the Battle of El Teb. For his services he was mentioned in Despatches thrice, and holds the Serbian Decoration, Karageorge. He commanded the Cadet Wing, Royal Air Force, and was appointed Staff Officer, 1st Grade, 28 December 1918. Lieutenant Colonel A H C Kearsey has published 'The War Records of the York and Lancaster Regiment, South Africa, 1900-1902,1903'. He married, in 1907, the Honourable Frances Mitford, daughter of the 1st Lord Redesdale, and they had one son.
1914-1915: No. 1 | No. 2 | No. 3
Middle East #1 - Overview
[Lt. Colonel Kearsey's book commences with a survey of the General Strategy and Tactics of the Campaign:]
On December 17th, 1914, Egypt, with the sanction of France, became a British Protectorate. Turkish suzerainty disappeared. Our chief problem was to defend the main and vital artery of intercommunication of the Empire between the East and West, namely, the Suez Canal. Also, we made Egypt into a training ground for the Empire's reserve of Commonwealth and Indian troops. Thus, at first our policy was to secure Egypt and the hundred miles of canal between Suez and Port Said.
Later our policy changed, and led us into an offensive campaign against the Turks until, by the Armistice, we had reached Aleppo, 500 miles from the Canal. The reason for this was, in the first place, the need to economize troops by occupying the Qatiya Oasis, and thereby denying to the enemy a position from which they could advance to the Canal and interfere with the shipping on it. If we held the whole length of the Canal a larger number of troops would be required than if we were astride the most likely line by which the enemy could advance towards it. Later, political motives caused us to occupy El Arish. Here we had superior numbers to any that the enemy could bring against us at the time. It was possible, therefore, to capture Rafa and Gaza before these places could be strengthened and while there was still an open flank round which we could use our great superiority in cavalry to the best advantage. Though we were checked at Gaza on March 26th and April 18th, 1917, our offensive operations enabled us to drive the Turks out of Egypt. This success was exploited until Jerusalem was captured by December 9th, 1917 and then until we entered Aleppo on October 26th, 1918.
OPPOSING FORCES: The Turks hoped to be able to bring their Syrian striking force of 65,000 men against our Canal defences early in 1915. In Syria, Djemal Pasha, the Turkish Commander, had the VIII Turkish Army Corps of three divisions, some troops of their XII Army Corps, with third line and depot troops in Syria. By the end of November, 1914, he had in Central Syria also the IV Corps, 10th Division, heavy artillery, pontoon and ammunition trains. At Adana were left the III and V Army Corps. Their Hedjaz Division was brought up from Medina to Nelchl.
By the end of 1914 we had in Egypt the 100th and 11th Indian Divisions, the 42nd Territorial Division, Yeomanry, and Australian and New Zealand Divisions bringing our total in Egypt up to 70,0000, exclusive of 22,000 Egyptian and Sudanese troops. Thus, we should have superior numbers to the Turks in the Canal area, although they were able during the war to enroll 2,700,000 men. In spite of poor organisation and shortage of rations the Turks marched well, held positions stubbornly, and were quick and gallant in making counter-attacks. Their shooting was accurate with their guns, machine guns, and rifles.
The Germans supplied their Flying Corps and the personnel for their telegraphs and railways. In 1916 the Germans supplied Pasha groups as reinforcements. These consisted of a squadron, a battery, a battalion, and technical detachments.
GEOGRAPHY. The country of Egypt is a desert, except in the Nile delta and on the banks of the rivers. where it is fertile and habitable. The Suez Canal is approximately thirty miles from the habitable delta. There were no metalled roads in the country except in the cities. The means of transport were by the railway along the western side of the Canal, and from Ismailia on the Canal to Cairo and to Alexandria. East of the Suez Canal is the Sinai Peninsula, approximately 120 miles broad. This was a formidable obstacle, in which water was scarce.
In the centre of the Sinai Peninsula is a waterless, stony plateau, rising in places to 3,000 feet. In the south the rocky hills rise to a height of 10,000 feet. In the north there is heavy sand. The water supply on each of these routes is precarious. The Wadi el Arish which runs between Nekhl and El Arish is dry for the greater part of the year. At times, between December and February after the rains, it is filled with water. During these times the rock cisterns throughout the peninsula become filled with water.
There are no roads fit for wheeled transport. For an advance on the Canal there were three possible routes. The southern route from Aqaba via Nekhl towards Suez and Kubri is over such rocky country as to be unlikely for any large force. The central route is from Beersheba or El Arish through Hassana and Jifjafa towards Ismailia. The northern route along the coast runs through Abd and Qatiya. For any large force the more likely line of advance would be towards Ismailia or Qantara. Further north the Suez Canal is protected by the Plain of Tina. The roughness and steepness of the country and the scarcity of water prevent any large bodies from crossing the southern route. The central route was the best and most sheltered road for an army advancing from the east. The northern route was vulnerable to shell fire from the sea. The Suez Canal is a formidable obstacle with both flanks secured by the sea. It is over 200 feet wide, with banks 40 feet high. There is an excellent field of fire from its eastern bank over the desert, except in a few places where there are sand-dunes giving cover south-east of Ismailia and east of the Bitter Lake and of Qantara. The Turks had no railway to help them across the Sinai Desert beyond Kossaima, and there was no route for mechanical transport. Their advanced bases were at Gaza and Beersheba. From these starting points the best line of advance for the Turks would be the central route across the desert, as it led to the sweet water canal at Ismailia. This canal could then be followed up to Cairo.
COMMUNICATIONS. Behind their advanced bases the Turks had railways of different gauges. The main base of the Turkish Forces was at Haidar Pasha, opposite Constantinople, on the eastern side of the Bosphorus. From this base a single-line track of standard gauge ran through to Muslimie, which is just north of Aleppo, and on to Rayak. This railway was incomplete through the Taurus (11,000 feet) and Amanus (6,000 feet) Mountains.
All troops and transport had to cross these two ranges by road in the early stages of the campaign. The tunnel through the Taurus Mountains was completed only just before the Armistice. The metre gauge line was continued from Muslimie through Aleppo to Rayak. Then for 250 miles to Southern Palestine there was great difficulty in maintaining the railway service owing to lack of fuel and repair shops and material. From Rayak the single track metre gauge ran west to Beirut and south through Damascus to Deraa, where it branched in a westerly direction through Afule to Haifa, and ran south via Maan to Medina, 25o miles from Mecca. A French line of railway ran from Jaffa to Jerusalem. It took as long as six weeks for reinforcements to arrive from Haidar Pasha to the Turks' Palestine front at Gaza and Beersheba. The distance was approximately 1,275 miles.
PLANS FOR 1914: Owing to the difficulties of transport and movement, the Turks, out of their striking force, were only able to organize a force of approximately 12,000 men for their raid on Egypt. Djemal Pasha began his preparations in November for a raid on Egypt, where he hoped to add to our difficulties by raising a revolt in favour of Turkey, and he wished to interrupt the traffic on the Suez Canal. He decided to advance by the three routes across the Sinai Peninsula and to make his main attack by the central road against our positions at Deversoir, Seripeum, and Tussum. It was in this area that the Turks could hope to obtain quickly the much-needed fresh water if they were successful in crossing the Suez Canal.
Our plans were to use the Suez Canal as an obstacle. The 10th and 11th Indian Divisions with the Imperial Service Cavalry Brigade and the Bikanir Camel Corps were responsible for the Canal defence, helped by the fire of the ships from the Canal. The 10th Division and part of the 11th Division provided the Canal posts. A reserve was retained at Moascar, near Ismailia.
Return to the top
Middle East #2 - Operations in 1914 and 1915
[On December 23rd 1914 the Turkish force entrained at Damascus for
operations against Egypt. They consisted of two cavalry regiments,
three infantry divisions, two six inch howitzers, two machine gun
companies and two engineer companies.
On New Years eve 1914, the 10th and 11th Indian Divisions, the 42nd
British Division and ANZAC troops arrived in Egypt. By the 3rd
February the Turkish force had been driven back by the Suez defences,
supported by the fire of the cruisers and gunboats. They had
withdrawn from the Suez canal area by the 5th February 1915.]
OPERATIONS IN 1914. By November 15th the Turks had approximately
8,000 men in E1 Arish. By November 2oth the Turks were in force
twenty miles east north-east of Qantara in touch with our Bikanir
Camel Corps. By December 31st our forces in Egypt numbered
70,000. The Turks had by this date formed advanced depots at Khan
Yunus, El Arish, Auja, and Kossaima and 12000 men and guns had
advanced on the Suez canal by the beginning of February
1915. Although the Turkish forces were driven back, the effect of
the attack was to interfere with the shipping activities through the
Suez canal for a significant period of time.
[See Advance by the Turks on the Suez Canal, 1915 - map 1]
OPERATIONS IN 1915. By January 26th our forward troops were in touch
with the Turks near Qantara. Four cruisers occupied their stations in
the Canal to support the troops at Qantara, Ballah, Shatt, and
Shallufa. By February 2nd the situation was that there were
approximately 10,000 Turks with guns and pontoons east of Serapeum
and Ferry Post. It was estimated that they had nine batteries and two
six-inch howitzers in the vicinity of the Canal.
Two thousand Turks supported by guns were east of Qantara. On the
night of February 2nd/3rd the Turks advanced to attack our posts at
Qantara, Ferdan, Ismailia, and Tussum. Their attempts to cross the
Canal between Serapeum and Tussum completely failed. Only three
pontoons got across, and all the occupants were either killed or
captured.
Their artillery was effectively dealt with by the guns of the
[British cruisers] Hardinge, Requin, and d'Entrecasteaux . From
Serapeum we made a successful local counter-attack on the east bank
of the Canal. The main result for the Turks of this raid was that the
night shipping in the Canal was suspended for a week, and day
shipping was stopped for twenty-four hours. At 1400 hours on February
3rd the Turkish artillery ceased fire, and shortly afterwards the
whole force began to withdraw by the routes by which they had
advanced. Their casualties were over 2,000. Our pursuit was not
vigorous. On February 4th the Imperial Service Cavalry Brigade
crossed at Ferry Post and captured a small convoy, but did not
closely engage the enemy. By the evening of February 4th the yeomanry
in Cairo were sent by train to Ismailia, but there were no means of
rapidly transporting so many mounted men across the Canal, nor was
the water supply organized for operations in the desert with the
available camel, mule and donkey transport. The result was that the
Turks were able to retire with all their guns and baggage.
This raid caused us to reconsider plans for the defence of the Suez
Canal. We now realized the extent to which a descent on Egypt from
the East was practicable, and the fact that a purely passive defence
would enable the Turks to interfere with the traffic on the Canal,
through which it was essential to maintain open intercommunication
between the East and our main theatre of war on the Western Front.
Our plans now, therefore, were to make dispositions for a more
active defence of Egypt, while the Turks were fully occupied with
expeditions up the River Tigris and in Gallipoli.
The Turks had no available troops for another raid during 1915
across the Sinai Peninsula, and, consequently, they made efforts to
stir up Senussi hostility in the Western Desert. In this area there
was much unrest among the Arabs. It was, therefore, found necessary
to withdraw our posts in the Western Desert to Mersa Matruli, and to
concentrate there a sufficient force to secure the Alexandria-Dabaa
railway, to deal with local situations and to reconnoitre the Maghara
Oasis. This force consisting of a yeomanry brigade and an infantry
brigade, was formed by November 20th. Early in December the Senussi
began to assemble in this area. By December 20th our composite
brigade was.assembled at Mersa Matruh. It consisted of a yeomanry
regiment, a section of horse artillery,
the 15th Sikhs less two companies, and six armoured cars. The Senussi
in the vicinity of the Wadi Senab, Sahifa, and Ras Manaa were
estimated at approximately 1000 to 1500 and two guns. Between
December 11th and 13th they were driven out of the Wadi Senab.
It was fortunate that the Senussi adopted a regular form of war and
were prepared to make a stand and to hold positions instead of
adopting the usual methods of guerrilla warfare. Had they scattered
and harried our lines of communication, and made full use of their
mobility to operate between the different oases on the Libyan Desert,
our difficulties in dealing with them would have been much greater.
After the Wadi Senab had been cleared, the Senussi collected in the
Wadi Majid. They occupied a commanding position on Gebal Medwa Hill,
six miles south-west of Mersa Matruli. This position was attacked by
two columns from different directions. The enemy was driven out of
his position with considerable loss on December 25th.
Return to the top
Middle East #3 - Engagements east of the Suez Canal
[Map #1 does not show Romani but this village is about 25 miles east
of the Suez Canal and 10 miles west of Qatiya. Oghratina lies between
Qatiya and Abd. El Arish is a further 30 miles east of
Abd. Mageibra lies 20 miles south of Abd. The word 'Hod' means an
oasis and the importance of this area is that water is only available
in the north Sinai desert at the rock cisterns and small oases, this
water is often polluted and dysentery was common on both sides. In
the absence of potable water, camels were used to carry cannisters of
drinking water to the troops.
Ridges of shallow sand dunes, like Wellington Ridge, and large sand
dunes, like that one called Mount Royston, assume great
importance. The Turkish Forces were supported by German infantry,
guns and aircraft under the command of General Kress von Kressenstein.]
By the middle of April 1915 Kress von Kressenstein undertook an
enterprise along the northern route. On April 23rd his force,
estimated at 3,650 men, six guns four machine guns, and six companies
of camelry, successfully attacked our advanced posts at Qatiya and at
Oghratina and Hamisah.
Their attacks on our posts at Dueidar and Hill 70 were unsuccessful.
In these engagements the 5th Mounted Brigade was protecting the
railhead five miles west of Romani with the following detachments: A
squadron, a machine-gun detachment and dismounted details at Qatiya.
At Oghratina there were two squadrons less one troop and an R.E.
detachment. At Hamisah were three squadrons and one troop. The
headquarters and remainder of the 5th Mounted Brigade were at Romani.
Dueidar was occupied by 156 rifles and Hill 70 by one battalion. At
0415 hours the post at Oghratina was first attacked from three sides
by the Turks, who were then not more than fifty yards from our
forward defences. The defenders, after two and a half hours of
stubborn resistance, were forced to surrender. The Turks then
attacked the Qatiya force, which, though reinforced by a squadron of
the Worcesters from Hamisah, was unable to hold out after 1500 hours.
Early on April 23rd, the Commander of the 5th Mounted Brigade with
the Warwickshire Yeomanry had made a raid on the enemy's camp at
Mageibra. This he found empty, as the occupants of it had gone to
raid our posts at Dueidar and Hill 70. The commander of the five
troops and machine-gun section who had been left at Romani marched
out to relieve the Qatiya garrison, but there was no co-operation
with the Brigade Commander's force and little could be effected. Our
troops at Dueidar successfully maintained their position.
They were not surprised at any of the six works surrounding the
Dueidar Oasis. The Turks had heavy casualties throughout the
day. They were pursued by the 5th Australian Light Horse Brigade and
by the Flying Corps.
After this Romani was occupied by infantry and the railhead was
advanced. A line of fortifications, consisting of eighteen infantry
redoubts, each with 100 rifles and two machine guns, was constructed
between Mahamdiyeh and Katib Gannet covering Romani. The Anzac
Mounted Division watched this front and made many long-distance
reconnaissances.
During the summer Senussi forces under Sayyid Ahmed, operating from
the oases of Bahariya, Farafra, Kharga, and Dakhla became troublesome.
The 53rd Division and some brigades of dismounted yeomanry were
distributed between Faiyum (eighty miles south-west of Cairo) and
Assuan. It was not until February, 1917, that Sayyid Ahmed was
finally defeated, and his forces were dissipated by a detachment of
armoured cars from Sollum. Ali Dinar, of Darfur, who had also been
hostile, was defeated near El Fasher by a force under Colonel Kelly,
commanding Egyptian troops, during May. Ali Dinar escaped, but he was
killed on November 5th, when his following of 2,000 men was
completely routed. The Sherif of Mecca led the Arabs of the Hedjaz
against the Turks. Jeddah was captured on June 12th, and Taif fell on
September 23rd. Medina in the meantime was invested. During the
summer the Arab forces in front of Medina were joined by Colonel
Lawrence. He persuaded Feisal, the Arab Commander, to withdraw his
forces to Wejh and to menace the Turkish communications. This caused
the Turks to dissipate their forces along the Hedjaz railway. At Wejh
an Arab training depot was formed. Colonel Lawrence then led a force
of Arabs against Aqaba from the north and captured it on July 6th.
This place then became Feisal's base for the Arab force. Later, this
Arab force protected the right flank of the British army in its
advance through Palestine, and, finally, closely co-operated in the
defeat of the Turks in the fighting between Damascus and Aleppo in
1918.
After the advance to Qatiya in April, Kress von Kressenstein did not
make any further movement until July. On July 19th our R.F.C.
reported that approximately 8,000 Turks were in the vicinity of Abd,
Bir Jemeil, and Bir Baytid. On the following day a large force was
reported to be at Oghratina, and that 3,000 Turks of the 3rd Turkish
Division with eight machine-gun companies were at Mageibra. On August
2nd the Turks were located between Mahamdiyeh, Katib Gannet Hill, and
Etmaler. Their force was estimated to be fifteen battalions, two
batteries of mountain artillery, heavy artillery (making a total of
thirty guns), engineers, thirty-eight machine guns, and two camel
corps companies. Their force was estimated at 18,000 when it left
Shellal.
On the evening of August 3rd the main body of Kress von
Kressenstein's force followed up the 2nd Australian Light Horse
Brigade as it withdrew back to its position on Wellington Ridge. At
this time our left flank rested on the sea, and our right flank on
Etinaler Hill and Katib Gannet, covered by troops at Hod el Enna,
Mount Meredith, and Wellington Ridge. The Turks meant to envelop our
southern flank and to gain a position on the railway between Qantara
and Romani. At midnight on August 3rd/4th they pressed their attack
against the outposts on our right flank, held by the 1st A.L.H.
Brigade from Katib Gannet to Hod el Enna. The Turks were in greatly
superior strength, and were able to drive back the 1st A.L.H. Brigade
over Wellington Ridge to Mont Royston. Early on August 4th they made,
in addition, frontal attacks, supported by heavy artillery from Abu
Hamra, against our entrenched position running south from a point a
mile east of Mahamdiyeh Station.
Our right flank extended to a point beyond which they made their
enveloping attack, and, consequently, in attempting to prolong their
line of attacking troops in order to overlap our flank their two
forces lost touch. Their southern force, intended to envelop our
flank, became involved in heavy sand hills one and a half miles from
the railway by the early afternoon on August 4th. Two mounted
brigades were sent to make a counter-attack, and by 1830 hours had
regained Mount Royston.
Return to the top
Middle East #4 - 1916
[In this extract the author,Lt. Colonel Keasley, referred to support by
the RAF. However his book was written in 1935 and he must have
forgotten that the RAF was not formed until April 1st 1918!
There is also a reference to the rescue of the crew of HMS Tara. HMS
Tara was a converted Irish Sea Ferry steamer and on the 5th November
1915 she was sunk off Tripoli by U35. The submarine towed the crew
of 93 in their lifeboats to shore and Turkish captivity. The men
suffered many privations, they were marched away barefoot and
survived mainly by scavenging dead animals and on one occasion boiled
snails. Their water was polluted and many developed dysentery. Only
40, out of the 93 who were captured, were alive to be rescued by the
armoured cars in March 1916.]
OPERATIONS 1916. The operations of 1916 started with further
fighting against the Senussi. On January 23rd two of our columns left
their camp at Bir Shola, twelve miles south-west of Mersa Matruh. One
column. composed of infantry and a small proportion of cavalry and
guns, made a frontal attack, while the other column, containing six
squadrons, a horse artillery battery, and a machine-gun section,
operated against the enemy's southern flank at Halazin. The Senussi
were driven from their entrenched camp by the infantry by 1445 hours.
The cavalry, however, were too much exhausted owing to lack of water
to carry out a serious pursuit.
The result was that the bulk of the enemy was able to withdraw. By
February 20th, 1600 Senussi with four guns were located at Agagiya,
sixty-five miles west of Mersa Matruh. By February 23rd our column,
consisting of four squadrons of yeomanry, three battalions, and a
horse artillery battery, reached a position at the mouth of the Wadi
Mehtila, eight miles north-cast of the enemy's position. Early on
February 26th the yeomanry moved out of camp and accurately located
the enemy's position. The infantry made a frontal attack, and drove
the Senussi out of their position with the close co-operation of the
artillery and machine guns.
The Yeomanry remained in a position of readiness out of sight of the
retreating Senussi until the ground was suitable for their mounted
action. Their opportunity arrived about 1400 hours, when the order
was given to charge.
The enemy were completely surprised and routed. Their leader, Jafar
Pasha, was captured, and they were never again able to fight as an
organized force. Sollum was reoccupied on March 14th. On March 18th
an armoured car detachment, under the Duke of Westminster, started
across the desert to find the imprisoned crew of H.M.S. Tara. This
detachment covered 240 miles in twenty-four hours, and was successful
in bringing back forty survivors of the crew.
OUR PLANS FOR 1916 were to maintain an active defence in Egypt and
to reduce the number of troops required for the security of the Suez
Canal. The first step was to be the occupation of the Qatiya, area,
where the railway and pipe-line were to be brought for the
maintenance of troops in the forward area. The Qatiya Oasis was to
be held with one division and three mounted brigades. A reserve of
three divisions was to be held on the Canal. The thirteen divisions
in Egypt were to be sent to other theatres of operations as soon as
possible. [See Advance by the Turks on the Suez Canal, 1915 - map 1]
Actually, before the end of March, six divisions had left Egypt. By
denying to the enemy the Qatiya-Romani area, a suitable assembly
place for the Turks, it would be possible to organize a mobile column
for offensive operations and would enable us to abandon the long and
elaborately fortified line east of the Suez Canal. It would also be
possible to keep the enemy from bombarding the Canal with long range
artillery fire. The enemy would have the disadvantage of crossing the
sixty miles of sandy desert from El Arish if they were to attempt to
assume the offensive in the area in which their chances of success
were most probable, as the water-bearing prospects were far greater
and more suitable for a large force than in any other quarter in the
vicinity of the Canal. For the Turks advancing on the Canal the
country between Kossaima and El Arish was important. These were the
two nearest road centres for a force advancing from the east towards
the Canal. There should be no surprise attack on troops defending the
Canal if these areas were adequately watched by mobile troops and
R.A.F [sic]. It was estimated that of the 250,000 Turkish troops in
Syria, a force of approximately 40,000 could be maintained with water
in the Wadi el Arish, and a similar number in the Qatiya-Romani area,
Neither of the other two routes leading to the Canal possessed such
favourable lines of advance or such an abundant water supply. For the
supply of the troops in the Romani area a railway of standard gauge
and a pipe-line of Nile water were brought out from Qantara. Steps
were also taken to add to the mobility of the force by organizing
camel companies, each of 2,000 camels, and also donkey companies,
each of 2,000 donkeys. Finally, 35,000 camels and 8,000 donkeys were
organized on a company basis. Trains also were organized, namely, six
divisional trains each of seventy-two limbered G.S. wagons, and two
mixed horse and motor transport trains, each capable of carrying
seventy-two tons of supplies. Owing to our organization and forward
policy the initiative passed to us, and, in spite of two advances
made by the Turks during igi6, we continued our advance through
Palestine and Syria to Aleppo. On March 10th, General Sir John
Maxwell handed over his command to General Sir Archibald Murray. The
force in Egypt now became the Egyptian Expeditionary Force.
A point for consideration now was whether the Turkish operations
towards Baghdad and towards the Canal might not be dealt with by one
amphibious expedition from Alexandretta based on Cyprus. An advance
in force towards Aleppo would then enable us to be astride the Turks'
communications, and would save our long advance up the Tigris and up
through Palestine and Syria with large forces. Comparatively small
forces could safeguard our interests in the Basra Vilayet and in the
Qatiya Oasis. There would be considerable economy of force on our
part, and great saving in man-power, material, and in resources.
We had failed in our Gallipoli campaign. The great difficulties of
amphibious warfare had been clearly brought home to us, and though we
had superiority of sea power with surface ships there was the
increasing and costly menace of the submarine. In addition, the
troops available for this expedition to Aleppo would have been those
released from Gallipoli, and though there were now in Egypt twelve
infantry divisions, two brigades of Indian infantry, dismounted
yeomanry, and mounted brigades, yet they required a rest before
undertaking further active operations.
It was not possible to calculate how many could be taken for this
operation as reinforcements might be required either for the Tigris
Operations or for the Salonika campaign.
Our landing, too, might be opposed by the bulk of the 250,000 Turks
reported to be in Syria and Palestine. The scheme for the landing at
Alexandretta was, therefore, abandoned.
Return to the top
Middle East #5 - April-August 1916
[The Germano-Turkish forces under German command continued to attack
along the coast east of the Suez canal. They were successful in
occupying the important water source at Qatiya but failed to advance
further and Romani was occupied and fortified by the British, serving
as a base for long distance reconnaissance by the Australian Light
Horse. The railway was extended to Romani. See map 1]
By the middle of April Kress von Kressenstein undertook an
enterprise along the northern route. On April 23rd his force,
estimated at 3,650 men, six guns, four machine guns, and six
companies of camelry successfully attacked our advanced posts at
Qatiya and at Oghratina and Hamisah.
Their attacks on our posts at Dueidar and Hill 70 were unsuccessful.
In these engagements the 5th Mounted Brigade was protecting the
railhead five miles west of Romani with the following detachments: A
squadron, a machine-gun detachment and dismounted details at Qatiya.
At Oghratina there were two squadrons less one troop and an R.E.
detachment. At Hamisah were three squadrons and one troop. The
headquarters and remainder of the 5th Mounted Brigade were at Romani.
Dueidar was occupied by 156 rifles and Hill 70 by one battalion. At
0415 hours the post at Oghratina was first attacked from three sides
by the Turks, who were then not more than fifty yards from our
forward defences. The defenders after two and a half hours of
stubborn resistance were forced to surrender. The Turks then attacked
the Qatiya force, which, though reinforced by a squadron of the
Worcesters from Hamisah, was unable to hold out after 1500 hours.
Early on April 23rd, the Commander of the 5th Mounted Brigade with
the Warwickshire Yeomanry had made a raid on the enemy's camp at
Mageibra. This he found empty, as the occupants of it had gone to
raid our posts at Dueidar and Hill 70. The commander of the five
troops and machine-gun section who had been left at Romani marched
out to relieve the Qatiya garrison, but there was no co-operation
with the Brigade Commander's force and little could be effected. Our
troops at Dueidar successfully maintained their position.
They were not surprised at any of the six works surrounding the
Dueidar Oasis. The Turks had heavy casualties throughout the day.
They were pursued by the 5th Australian Light Horse Brigade and by
the Flying Corps.
After this Romani was occupied by infantry and the railhead was
advanced. A line of fortifications, consisting of eighteen infantry
redoubts, each with 100 rifles and two machine guns, was constructed
between Mahamdiyeh and Katib Gannet covering Romani. The Anzac
Mounted Division watched this front and made many long-distance
reconnaissances.
During the summer Senussi forces under Sayyid Ahmed, operating from
the oases of Bahariya, Farafra, Kharga, and Dalchla became troublesome.
The 53rd Division and some brigades of dismounted yeomanry were
distributed between Faiyum (eighty miles south-west of Cairo) and
Assuan. It was not until February, 1917, that Sayyid Ahmed was
finally defeated, and his forces were dissipated by a detachment of
armoured cars from Sollum. Ali Dinar, of Darfur, who had also been
hostile, was defeated near El Fasher by a force under Colonel Kelly,
commanding Egyptian troops, during May. Ali Dinar escaped, but he was
killed on November 5th, when his following of 2,000 men was
completely routed. The Sherif of Mecca led the Arabs of the Hediaz
against the Turks. Jeddah was captured on June 12th and Taif fell on
September 23rd. Medina in the meantime was invested. During the
summer the Arab forces in front of Medina were joined by Colonel
Lawrence. He persuaded Feisal, the Arab Commander, to withdraw his
forces to Wejh and to menace the Turkish communications. This caused
the Turks to dissipate their forces along the Hedjaz railway. At Wejh
an Arab training depot was formed. Colonel Lawrence then led a force
of Arabs against Aqaba from the north and captured it on July 6th.
This place then became Feisal's base for the Arab force. Later, this
Arab force protected the right flank of the British army in its
advance through Palestine, and, finally, closely co-operated in the
defeat of the Turks in the fighting between Damascus and Aleppo in
1918.
After the advance to Qatiya, in April, Kress von Kressenstein did
not make any further movement until July. On July 19th our R.F.C.
reported that approximately 8,000 Turks were in the vicinity of Abd,
Bir Jemeil, and Bir Baytid. On the following day a large force was
reported to be at Oghratina, and that 3,000 Turks of the 3rd Turkish
Division with eight machine-gun companies were at Mageibra. On August
2nd the Turks were located between Mahamdiyeh, Katib Gannet Hill, and
Etmaler. Their force was estimated to be fifteen battalions, two
batteries of mountain artillery, heavy artillery (making a total of
thirty guns), engineers, thirty-eight machine guns, and two camel
corps companies. Their force was estimated at 18,000 when it left
Shellal.
On the evening of August 3rd the main body of Kress von
Kressenstein's force followed up the 2nd Australian Light Horse
Brigade as it withdrew back to its position on Wellington Ridge. At
this time our left flank rested on the sea, and our right flank on
Etmaler Hill and Katib Gannet, covered by troops at Hod el Enna,
Mount Meredith, and Wellington Ridge. The Turks meant to envelop our
southern flank and to gain a position on the railway between Qantara
and Romani. At midnight on August 3rd/4th they pressed their attack
against the outposts on our right flank, held by the 1st A.L.H.
Brigade from Katib Gannet to Hod el Enna. The Turks were in greatly
superior strength, and were able to drive back the 1st A.L.H. Brigade
over Wellington Ridge to Mont Royston. Early on August 4th they made,
in addition, frontal attacks, supported by heavy artillery from Abu
Hamra, against our entrenched position running south from a point a
mile east of Mahamdiyeh Station.
Our right flank extended to a point beyond which they made their
enveloping attack, and, consequently, in attempting to prolong their
line of attacking troops in order to overlap our flank their two
forces lost touch. Their southern force, intended to envelop our
flank, became involved in heavy sand hills one and a half miles from
the railway by the early afternoon on August 4th. Two mounted
brigades were sent to make a counter-attack, and by 1830 hours had
regained Mount Royston.
Return to the top
Middle East #6 - August - December 1916
[By December 1916 the Turkish army had been defeated in North Sinai
and driven from El Arish, about 100 miles east of Port Said. Captain
Teichman RAMC of the 1st Worcester Yeomanry has given us a
contemporary description of El Arish when it was newly occupied. It
was badly damaged by aerial bombing and naval shelling and he
reported that the inhabitants were very nervous every time an
aeroplane flew over. They were justified in their fear as a landing
stage had been constructed, lighters from Port Said were already
unloading stores but the landing stage was bombed by German aircraft
on December 24th. However the natives were friendly and the shops
were open, although the Turks has seen too it that very little had
been left behind. British soldiers were warned not to touch any
ropes that they saw lying on the ground at El Arish as two men had
been killed by land mines left behind. The Yeomanry horses were
watered at 60 foot deep wells where the natives let little boys down
on ropes to fill the buckets. ("Diary of a Yeomanry M.O." by Captain
O. Teichman, RAMC, 1921, p. 93)]
The Turks now made no effort with their reserves, or by pressing
their frontal attacks to restore the situation. Instead, when their
enveloping movement failed they fell back in disorder. We still had
in reserve five battalions in the vicinity of Etinaler, and three
brigades posted along the railway between Qantara and Pelusum. Also
from No. 2 section were Smith's mobile column and the 3rd A.L.H.
Brigade available for pursuit. However, although we recaptured
Wellington Ridge at daybreak on August 5th, yet we could not
effectually follow up the Turks, who were adequately covered by
rearguards, owing to the difficulty of coordinating the movements of
the separated brigades of the mounted division, and owing to the
difficulties of water supply and the intense heat, which was most
exhausting for infantry marching in soft sand. The Turks were able to
withdraw with a loss of approximately 5000 casualties, four guns,
nine machine guns, and 4,000 prisoners.
On August 7th they were on the line Hod el Masia - Oghratina. On
August 9th they were able to repulse a direct attack by the Anzac
Mounted Division in the vicinity of Bir el Abd. They then withdrew
towards El Arish. The Turks undertook no further offensive actions,
and they were gradually driven into Palestine. General Murray now
decided to clear the Sinai Peninsula and to occupy El
Arish. Accordingly he formed an Eastern Force for this advance. This
force was under the command of General Dobell, and consisted of all
the troops east of the Canal.
General Dobell further split up the forces at his disposal by
forming a Desert Column as a striking force. This column consisted of
the 42nd, 52nd, and Australian and New Zealand Divisions, under
General Sir Philip Chetwode. The troops were to be accompanied by the
standard railway and the pipeline from Qantara. The rate of advance
for the railway was about 20 miles a month. By December 9th the Turks
at El Arish were estimated to be 1600 infantry in strongly entrenched
positions.
During the night December 20th/2ist the Australian and New Zealand
mounted troops and Camel Corps marched on El Arish, supported by the
52nd Division. Soon after daybreak on December 21st mounted patrols
found that El Arish was unoccupied. The R.F.C. reported that 1600
Turks were marching towards Magdhaba and Abu Aweigle, and that
Maghara had been vacated. Our troops then occupied El Arish and
stores were landed on the beach. The Turks had prepared a system of
five well-constructed redoubts at Magdhaba on both banks of the Wadi
el Arish. By daybreak on December 23rd the mounted division of the
Desert Column and the Camel Corps Brigade were within four miles of
these redoubts. Converging attacks were simultaneously made on the
Turks' defences, and were pressed with the greatest determination for
eight hours.
When No. 1 Redoubt had been captured by the combined attack of the
3rd Australian Light Horse Regiment working up the Wadi with two
companies of the Camel Corps Brigade advancing dismounted across the
open from the north-west, the whole defence collapsed. The Turkish
Commander and two battalion commanders with 1,280 prisoners were
captured.
Return to the top
Middle East #7 -Palestine - Plans and operations Jan-Feb 1917
[Kearsey discusses the plans for the taking of Gaza and describes the
early operations in January and February 1917.]
1917. Our policy was still the active defence of Egypt. Our plan was
to continue to advance by the coastal route, and to capture Rafa and
then Gaza on the same principle as had already been successfully
carried out in the capture of Magdhaba.
Full use was to be made of the factors of mobility and surprise. By
the capture of Gaza the Turks would be forced to evacuate Southern
Palestine, as we should be behind their base at Beersheba. These
operations were to be carried out as, soon as forward supply depots
could be organized and replenished, and camel and horse-transport
trains could be arranged.
We could confidently expect to have superior numbers at the decisive
time and place. The enemy in Southern Palestine could not have more
than1500 sabres, 12,000 to 16,000 rifles, and 74 guns. Our own troops
would be the 52nd, 53rd, and 54th Divisions, the Australian and New
Zealand Mounted Division, and the Imperial Mounted Division, a
light-car patrol and two light-armoured motor batteries, making a
total of 8,500, sabres, 92 guns, and 25,000 rifles. There was also
the 74th Division being formed in Egypt from Yeomanry units. In
addition, 55,000 men in the Egyptian Labour Corps were formed. The
plan which the Turks had arranged was to keep the bulk of their force
in a central position south of the Wadi Hesi with detachments at
Gaza, Sheria, Hureira, and Beersheba.
In order to carry out our plan it was necessary to increase the
mobility of the Eastern Force and to reorganize the supply and
transport arrangements, as the railway had only just reached the Wadi
el Arish. Therefore, seven camel trains, each with fifty-five camels,
were organized as first line transport. Each train was capable of
carrying seventy-two tons. Also six divisional trains were organized,
each with seventy-two limbered G.S. wagons, while two mixed horse-and
motor-transport trains, each capable of taking seventy tons, were
also organized.
If we could advance rapidly on Rafa and then on Gaza before the
Turks could withdraw from Beersheba and Wadi el Arish their
communications would be in danger, as we should be behind their
advanced base. Since their defeat at Romani the Turks had not
attempted to take the initiative against us. It was advisable,
therefore, to continue to press our offensive and to gain such an
important point as the fortress of Gaza while their morale was low,
and while we still had greater numbers for an attack against it than
they could collect locally. By operating in the coastal area we
gained the advantage of being in country suitable for mounted action.
Our superiority in mounted men was very considerable. In addition, we
should be helped by sea-power with the ships securing our left flank.
Again, in this Plain of Philistia north of Gaza there was one road to
Gaza from Java and Ranileh, and another from Jerusalem via Latrun.
There was ample water from the wells during and after the regular
rainfall from November to March. Crops were plentiful between April and
June.
The first operation in 1917 was the capture of the Turks reported to
be holding four strong works at Magruntein, 2,000 yards south-west of
Rafa. Early on January 9th the Turks in these entrenched works were
surprised by the Australian and New Zealand mounted troops and the
Imperial Camel Corps, who had made a twenty-nine-mile night march.
The N.Z.M.R. closed the exits from the north. The 3rd and 1st A.L.H.
Brigades attacked the Turkish works facing east, the Camel Corps
Brigade attacked the works facing southeast, while the 5th Mounted
Brigade operated against the redoubt on the south-west. The Turks
were not disposed in depth and had no reserves. Each of their works
was isolated and self-contained. Our troops were in touch with each
other right round their defences, and all had definite objectives.
The Turks, however, defended stubbornly, and at 1630 hours, as we had
not been able to gain our objectives, General Chetwode ordered a
withdrawal as information was received that Turkish reinforcements
500 strong were advancing from the north and north-east.
The determination of the troops, however, changed the situation. The
N.Z.M.R. Brigade, before the order to withdraw reached them, had
resolutely pressed their attack from the north against the Turks'
northern redoubt. This was captured after a bayonet charge. Then the
1st and 3rd Australian Light Horse Brigades charged, but the Turks
surrendered before these attacks were pressed home. One thousand six
hundred prisoners, four guns, and six machine guns were captured.
It was now reported that the Turks were concentrating near Shellal,
and that 5,000 were being sent to the vicinity of Gaza. Also they had
made strong works at Weli Sheikh Nuran.
By the end of February our mounted troops reached Khan Yunus. It was
now definitely decided to capture Gaza as soon as the railway reached
Rafa. All supply arrangements were made to enable troops to carry
through the operation in one day, If Gaza did not fall within this
prescribed time limit, it would be necessary to withdraw back to the
Wadi Ghazze for food, water, and ammunition. Success before nightfall
on the day of attack was thus an indispensable condition. If Gaza was
captured within twenty-four hours of the commencement of hostilities
there was ample water there for all men and animals, and supplies
could be brought to the coast in the vicinity of this town by sea.
Return to the top
Middle East #8 - The 1st Battle of Gaza, March 1917
[The first attack on Gaza was a failure, mainly due to poor
communications and the lack of water for the cavalry between Wadi
Ghazze and Gaza. The Turkish defenders were on the point of
abandoning their position when the British and ANZACs were ordered to
retreat to Wadi Ghazze for watering and consolidation. See map 2]
By March 5th the Turks began to fall back on Gaza, Sheria, and
Beersheba. By March 16th the broad gauge railway reached Rafa. By
this date, also, the Desert Column was in the vicinity of Shaikh
Zowaiid. By March 25th our force was assembled and ready to move on
Gaza. Advanced Headquarters were at El Arish. The Desert Column was
at Belah, the 54th Division was at In Seirat, the 52nd Division was
at Khan Yunus, and the Camel Corps and armoured batteries were about
Abassan el Kebir. On March 26th the first battle of Gaza was fought.
The enemy were estimated to have in the vicinity 1500 sabres, 16,000
rifles, and 74 guns.
Our strength was 8,500 sabres, 25,000 rifles, and 92
guns. Actually at Gaza it was estimated that there were 4,000 rifles
and 20 guns. Our plan of attack was to send the Mounted Divisions and
Camel Brigade across the Wadi Ghazze at Sheikh Nebhan, advance to
Mendur, and then to form a screen to the north-east and cast of Gaza,
to hold off enemy reinforcements and to prevent the garrison of Gaza
from escaping in these directions. The 53rd Division and one infantry
and one
artillery brigade of the 54th Division were to assault Gaza from Ali
Muntar to Samson Ridge.
A small detachment of one battalion of infantry and two squadrons of
yeomanry was to advance up the coast towards Shaikh Ajlin to cover
the left flank. These troops for the assault on Gaza were under the
command of the G.O.C. Desert Column.
The remainder of the 54th Division was to form a support to the
mounted troops by occupying a position at Mansura and Shaikh Abbas.
The 52nd Division was to form the general reserve west of El Breij
and to protect the line of communications. The headquarters both of
the Eastern Force and of the Desert Column were south of the Wadi
Ghazze at In Seirat. On March 26th at 0230 hours the A. and N.Z.
Division left its bivouacs and reached Beit Durdis by 1000 hours. It
was followed by the Imperial Mounted Division, who reached Mendur at
0930 hours. The Imperial Camel Corps also went to Mendur.
The 53rd Division started at 0100 hours. By 0745 hours the 158th
Brigade was on Mansura Ridge.
When the fog lifted at 0820 hours the Turks were completely
surprised to find our leading brigade within 4,000 yards of their
position. But, unfortunately, two hours had been lost by the 53rd
Division in waiting for the fog to clear, and the attack on the
Turks' trenches was not launched until nearly midday. Had the
infantry been close to the Turkish position, as they could have been
had they not been delayed by the fog, the attack might have started
earlier, and a decision might have been obtained before nightfall.
When the infantry attack did start the enemy had recovered from their
surprise, and the advance had to be made over the open plain from
Mansura by the 158th Brigade towards Ali Muntar and up the exposed
Sire Ridge by the 160th Brigade. The reserve brigade, the 159th, was
early sent in to attack on the right of the 158th Brigade.
It was not until 1600 hours that the 161st Brigade of the 54th
Division co-operated in the attack. This was due to the fact that
close touch was not maintained between the 53rd Division and the
161st Brigade, and the order to this brigade took a long time in
transit. However, by 1800 hours Green Hill had been captured, and the
whole Turkish position on the Ali Muntar Ridge was in our possession.
The 2nd A.L.H. Brigade and the New Zealand Mounted Brigade were on
the northern outskirts of the town, and were in touch with the
infantry on Ali Muntar.
Now the decision had to be made whether to push in to Gaza or not.
Unless Gaza was captured and the water in it obtained for the mounted
troops, it would be necessary for these troops to withdraw. If they
went back to water they would leave the infantry in their present
positions with their eastern flank exposed, and a considerable gap
between the two brigades of the 54th Division at Shaikh Abbas and the
troops on Ali Muntar. There was a risk in continuing the attack just
as it was getting dark, as there was increasing pressure by Turkish
reinforcements converging on Gaza. Some 7,000 Turks with a cavalry
screen were reported to be advancing from Hureira; from Deir Sineid
and Huj also large bodies were reported to be approaching. Soon after
1800 hours General Dobell issued orders for the mounted troops to
withdraw to the Wadi Ghazze. Previously he had ordered the 54th
Division to move in to the right of the 53rd Division in order to
close the gap between the two divisions. This order was not known to
the Commander of the attacking troops, who ordered the Commander of
the 53rd Division to withdraw his right back in order to gain touch
with the 54th Division. Thus the ground dominating Gaza from the
south-east, for which 4,000 casualties had been incurred, was
abandoned.
The result of these orders was that on the morning of the
27th the 53rd Division was in a position facing west through Sheluf,
while the 54th Division was in a position facing east through Mansura
and Burjabye. The Turks could then occupy the vacated dominating
positions of Ali Muntar and Shaikh Abbas. By 0930 hours on March 27th
the 53rd and 54th Divisions were back to back with not more than two
miles of intervening ground between them. The attempts by the 160th
and 161st Brigades to occupy Ali Muntar had failed. Their leading
troops had gained a position on Ali Muntar and Green Hill, but had
later been unable to retain them owing to heavy Turkish
counter-attacks. There was now no longer any hope of capturing Gaza,
and the present position of the infantry in the salient was
untenable. Orders were, therefore, given for a withdrawal to the west
bank of the Wadi Ghazze. It is summed up in despatches as follows:
"If it had been practicable for the G.O.C. Eastern Force to advance
with his three infantry divisions and two cavalry divisions I have no
doubt Gaza would have been taken and the Turks forced to retire, but
the reorganization of the force for a deliberate attack would have
taken a considerable time; the horses of the cavalry were very
fatigued, and the distance of our railhead from the front line put
the immediate maintenance of such a force with supplies. water, and
ammunition entirely out of the question. The only alternative
therefore, was to retire the infantry."
Later the Commander-in-Chief
wrote: "The operation was most successful, and owing to the fog and
waterless nature of the country round Gaza just fell short of a
complete disaster to the enemy."
As indicated in despatches, victory had been very nearly gained.
Actually, the Turks were on the point of abandoning their position.
The risks, however, of continuing the attack were considered to
outweigh the possible chances of success. We captured 837 prisoners
and two guns at a cost of 3,960 casualties.
By March 29th a defensive position was organized west of the Wadi
Ghazze, and was held by the 54th, 52nd, and 53rd Divisions. The Turks
strengthened and wired their defences up to Atawineh Ridge. By April
5th our railhead was at Belah. Supplies were landed at this place on
the open beach.
Return to the top
Middle East #9 - Delay in the 2nd attempt to take Gaza, April 1917
[Yet again the Egyptian Expeditionary force were unable to defeat the
staunch Turkish defenders who had the advantage of field of fire and
observation against the British advancing from the south.
The first stage of attack on Gaza was successful by April 17th 1917
but, despite the use of tanks and poison gas, the second stage was
unable to advance beyond Samson's Ridge and was deferred until
reinforcements could arrive from Salonika in June. As well as
British these included Indian, Adenese, French and Italian
soldiers. On June 28th, 1917, General Allenby was appointed in
command of the reinforced Egyptian Expeditionary Force. See map 2]
Our next attempt to capture Gaza was to be in two stages. The first
stage was an advance to the line Shaikh Abbas, Mansura, and Kurd
Hill. These objectives were captured early on April 17th with little
difficulty.
These positions were consolidated and tanks and heavy artillery were
brought up.
The second stage was started on April 18th. The plan was to subject
the Turkish trenches to a severe bombardment, and then to deliver
frontal attacks from Birket es Sana to the sea.
The 53rd Division was to advance up Samson Ridge towards Shaikh
Ajlin. The 54th and 52nd Divisions, under the command of the G.O.C.
52nd Division, were to capture the Khirbet Sihan works and also Ali
Muntar and Outpost and Middlesex Hills, south of Gaza. The Camel
Corps Brigade was to operate on the right flank of the 54th Division.
On the right of the Camel Corps Brigade the mounted divisions were to
attack, dismounted, the Atawineh trenches and seize the Birket es
Sana spur and demonstrate against the Hureira Redoubt. Our
preliminary bombardment with gas shells produced little result on the
Turkish trenches, guns, or machine guns on the large front which was
to be attacked. The few tanks available were unable to reach the
Turks' main positions. The limit of our advance was Samson Ridge on
our left by the 53rd Division; Outpost Hill was captured by the 153rd
Brigade; further to the east the left of the 54th Division reached
the Turks' forward trenches, but were then so enfiladed by fire from
Ali Muntar that they could not advance. The 161st Brigade reached
Tank Redoubt, and the Camel Corps Brigade penetrated to Khirbet
Sihan. The Turks, however, had strong positions on their 15,000 yards
frontage, and our numbers were not so superior to theirs as to
warrant success against an enemy who was always staunch in defence,
and who in this case had all the advantage of position and field of
fire and observation against an enemy advancing from the south. We
had 11,000 sabres, 24,000 rifles and 170 guns. The enemy had 1,500
sabres, 18,000 rifles and 101 guns.
By 1500 hours our casualties had been 6,400, our advance was
definitely checked, and the enemy still had their reserves in hand.
At 1820 hours we were forced by Turkish counterattacks to evacuate
Outpost Hill. Our line then ran from the sea at Shaikh Ajlin through
Samson Ridge, south of Outpost Hill, through Shaikh Abbas, Meshrefe,
to the Wadi Ghazze. One brigade of the 74th Division was at Mansura
ready to support the 52nd Division.
To deploy any more troops in further frontal attacks would only lead
to casualties. Artillery ammunition supply was becoming short. Orders
were therefore issued that the action should be broken off, that all
ground occupied should be consolidated, and that troops should be
prepared to resume the offensive after a bombardment at dawn on the
20th. Turkish counter-attacks were repulsed. The opinion of the
Commander of the Desert Column was that "in view of the great
strength of the positions to which he was opposed, the renewal of a
direct attack with the force at his disposal would not be justified
by any reasonable prospect of success."
Plans for further offensive operations were abandoned until
reinforcements arrived from Salonika. There was position warfare now
in front of our position from the Wadi Ghazze at Tel Jemmi on our
right flank through Sharta and Dumbell Hill to Shaikh Abbas. Our line
made an angle at this point, and ran in a north-westerly direction by
Mansura Blazed Hill, Heart Hill, Samson Ridge, to the sea at Shaik
Aflin.
On May 23rd the railway extension between Beersheba and Auja was
destroyed over a distance of 13 miles. Reinforcements began to arrive
during June. The 10th and 60th Divisions and the 7th and 8th Mounted
Brigades came from Salonika. Units from India and Aden with those in
Egypt enabled the 75th Divisions to be formed. French and Italian
contingents were also added to the Egyptian Expeditionary Force.
Communications were improved, and a branch railway was made from Rafa
to Shellal. The pipe-line was brought up to Belah. Reservoirs were
built at Belah, Tel Jemmi, Sitta, Khan Yunus, Shellal, Rafa, and
Qantara. The Cabinet decided to continue operations for the invasion
of Palestine, to carry out these operations, General Sir Edmund
Allenby was appointed to command the Egyptian Expeditionary Force, he
assumed command of the Egyptian Expeditionary Force on June 28th.
From this date until the Armistice in 1918 this campaign becomes
particularly interesting, not only because it was eminently
successful, but because it was most carefully planned and vigorously
executed. Full use was made of our great numerical superiority and of
our enormous resources to carry out an offensive campaign. Successes
were followed up and turned into complete victories, so that the
campaign became a factor in deciding the World War. There was
reasonable prudence in the conduct of operations, combined with the
greatest determination in carrying out plans to the limit of the
endurance of the troops and in accordance with the possibilities of
transport and supply. Periods of rest and reorganization were
followed by offensive action, energetically continued until the
objectives were reached. Difficulties of country varying from sandy
plains and enclosed river-valleys to steep, rocky, wind-swept hills
were overcome. The climate, varying from cold rain in the hills to
choking khamsins in the plains, was stubbornly endured. The intricate
problems in the field which the Commander had to decide were dealt
with so firmly, so promptly, and so effectively, that the
co-operation of all arms was assured. This confidence and unity led
not only to an unqualified success, but showed how military
operations in mobile warfare can and should be conducted.
Return to the top
Middle East #10 - The capture of Beersheba
[In view of the difficulties experienced in taking Gaza, it was
decided to bypass Gaza, leaving three divisions to demonstrate in
front of the town, and advance directly on Beersheba, 25 miles south
east of Gaza, and attempt to take it by a surprise attack. Sea
bombardment of Gaza helped to distract the Turks from the assault on
Beersheba.
Beersheba, with its good water supply, was occupied following the
famous cavalry charge from the east by the 4th Australian Light Horse
on October 31st. This took the Turkish defenders by surprise and
captured the water supply intact. The cavalry were supported by the
Honourable Artillery Company and the Desert Mounted Corps and the XX
Corps. See map 2]
Between June and October, while the Egyptian Expeditionary Force was
being reinforced and reorganized, the Turks also were improving their
communications, and adding to the strength of their garrisons and
their works. They constructed a chain of localities along their
thirty-two-mile front between Gaza and Beersheba. Besides the works
immediately covering these two places, they had made redoubts at
Kauwukah, Hur6ra, Baha, Atawinch, and Sihan. Only between Kauwukah
and Beersheba, four and a half miles apart, was there such a gap that
there was no close support between the defences. They had a good
metalled road connecting Gaza with Beersheba. A 3 ft. 6 in. gauge
railway ran to the Wadi Hesi, north of Gaza, and to Beersheba through
Sheria. General Allenby now organized the Egyptian Expeditionary
Force into three corps.. the XX Corps, consisting of the 10th, 53rd,
60th, and 74th Divisions; the XXI Corps, consisting of the 52nd,
54th, 75th Divisions and a composite force; and the Desert Mounted
Corps, consisting of the Anzac, Australian, and Yeomanry Mounted
Divisions. Our strength was 18,000 sabres, 80000 rifles, and 450
guns. The Turks had two corps and a cavalry division, namely, 1,500
sabres, 50000 rifles, and 300 guns. The courses open to General
Allenby for his offensive operations were governed by the following
considerations. Gaza was a very strong position guarding the coastal
route, which was the most favourable ground for his operations, with
the left flank secured by the navy.
The country between the Wadi Ghazze and Beersheba was waterless, and
there were no metalled roads available south of the main
Gaza-Beersheba road. There would be wide separation between two
forces operating at Gaza and Beersheba. There would be great
difficulty in surprising the enemy by an attack on Beersheba owing to
the great quantity of transport required for supplies and water; and
there would be great difficulty in providing the necessary transport
for a large striking force in the vicinity of Beersheba.
A direct attack on Gaza might lead to no decisive results, as the
enemy could fall back on the wadis north of Gaza at right angles to
our line of advance. Similar disadvantages occurred if the Atawineh
position was penetrated.
The available transport, namely 30,000 camels was sufficient only
for the supply of a corps with food and ammunition up to Beersheba
and one more march, but it would be entirely dependent on the water
supply there. Therefore, the capture of Beersheba on the day of the
assault was essential.
The plan for the attack of the Turks on the Gaza-Beersheba line was
that the enemy's left flank was to be turned by the Desert Mounted
Corps' attack with two divisions and the 7th Mounted Brigade from the
east and north-east. Two divisions of infantry were to attack the
main Beersheba defences from the south-west, while one division
covered the left flank of the attacking force. The XXI Corps was left
for the attack on Gaza. One mounted division was to hold the centre.
Beersheba was to be captured as rapidly and secretly as possible,
then the Turks' left flank defences at Hureira and Sheria were to be
captured and their garrisons pushed back on Gaza, while the cavalry
advanced towards the water supplies in the Wadi Hesi, and cut off
their retreat from Gaza. In order to mystify and mislead the enemy as
to our actual point of attack, the bombardment of Gaza was begun on
October 26th and was continued steadily for eight days and was
supplemented by naval gunfire from one cruiser, two gunboats, four
monitors, and two torpedo-boat destroyers.
Zero day was fixed for October 31st, by which time the Desert
Mounted Corps and the XX Corps were to be as near as possible to
Beersheba, while everything was done to contain the enemy in Gaza and
to make them think that the main attack was to be against their right
flank. Vacated camps were left standing, the navy was active with
soundings near the coast, while wells were developed in the Wadi
Ghazze, and railway and pipe-line were pushed out in an easterly
direction, and the Desert Mounted Corps and XXth Corps gradually
advanced in a south-easterly direction down the Wadi Ghazze towards
Beersheba.
During this period the Turks made a reconnaissance in force. On
October 27th two regiments of cavalry and 3,000 Turkish infantry with
guns attacked two advanced posts of our outposts, held by the London
Yeomanry of the 8th Mounted Brigade on Hills 630 and 720 near
Girheir. The post on Hill 720 was overwhelmed. but the post on Hill
630 held out till relieved by the advance of the 3rd A.L.H. Brigade
and the 158th Brigade.
The Turks appear to have gained no information from this operation.
Our preparations continued without further interruption. By the night
of October 3Gth/3Ist our troops were located as follows: The Anzac
Mounted Division was at Asluj; the Australian Mounted Division was at
Khalasa; the 7th Mounted Brigade. was at Esani. The Yeomanry
Division, acting as a covering force in the centre. was at Abassan el
Kebir. The XXI Corps was opposite Gaza. The XX Corps, forming part of
the striking force, was disposed as follows: The 10th Division and
Camel Corps Brigade were at Shellal, the 53rd Division was at Goz el
Goleib, the 60th Division was at Esani, the 74th Division was at
Khasif. The details of the attack on Beersheba were for the 74th and
60th Divisions to attack Hill 1070 and the enemy's works between the
Wadi Saba and the Khalasa Road on a front of 5,000 yards. Part of the
53rd Division covered the left of this attack. The 7th Mounted
Brigade covered the right of the 60th Division.
The infantry were to be in a position about 2,500 yards from the
Turks' trenches, from which they could assault their works by 0400
hours on October 31st. The mounted divisions were to be east of
Beersheba early enough to attack it before the enemy realized the
attack of the XX Corps. The main attack of this corps, it was
anticipated, would he delivered between 1000 and 1100 hours on zero
day. The G.O.C. Desert Mounted Corps was told to keep his men and
horses as fresh as possible for the principal operations, in which
they were to pass round the Turks' left flank and gain a position in
the vicinity of the Tel Nejile - Wadi Hesi.
On October 31st the Turks were surprised by the direction of the
attack of our mounted troops from the east of Beersheba after their
night marches of twenty-five and thirty miles respectively. They
reached their first objectives east of Beersheba, in the vicinity of
Khashm Zanna by 0800 hours. By 0830 hours Hill 1070 had.been captured
by the 18ist Brigade. Our guns were then moved forward to
wire-cutting range of the enemy's main position between the Khalasa
Road and the Wadi Saba. This position was bombarded from I030 hours
until midday, and then the 74th Division successfully assaulted it.
By 1930 hours the Turkish defences north of the Khalasa Road were
captured by the reserve brigade of the 74th Division. During these
operations by the infantry, 500 Turks and six field guns had been
captured.
On arrival at their first objective the mounted divisions had to
cross an open plain commanded on the north-east and south-east and
flanked by Tel Saba and Tel es Sakaty. It was not till 1300 hours
that Sakaty was captured by the 2nd A.L.H. Brigade. Saba did not fall
until 1500 hours. The 4th A.L.H. Brigade was ordered to make a
mounted attack against the trenches covering Beersheba. They were
supported by "A" Battery H.A.C., and the Notts Battery, firing at a
range of 2,500 yards. By 1830 hours the 4th A.L.H. Brigade had
captured the Turks' trenches. Their forward squadrons galloped over
the two front lines of trenches, then dismounted and attacked the
occupants with the bayonet; the remainder of the Brigade galloped
into the town and captured 1,100 prisoners and ten guns of the
Turkish 27th Division. Also they prevented the Turks from destroying
more than two of the seventeen wells in the town. The 4th A.L.H.
Brigade lost 31 killed and 33 wounded.
This preliminary operation was thus completely successful owing to
the fact that the Turks were surprised, and that the final assault
was carried through with great determination and rapidity.
Return to the top
Middle East #11 - The Turkish Forces retreat past Huj
[The loss of Beersheba opened the way for further advances. When
Sheria was taken on the 7th November the Turkish defence collapsed as
they had run out of reserves. Gaza fell and the British then
advanced as far north as Huj, about 20 miles north east of Beersheba.
See map 2 and map 3.]
Now that the Turkish left flank at Hureira and Sheria was exposed,
and the XX Corps was within striking distance of it, it was essential
to deliver the main attack as early as possible.
It was also necessary to contain the Turkish 3rd and 53rd Divisions
in Gaza to draw their reserves in this direction, and also to hold
off the troops north of Beersheba while the XX Corps had time to
reconnoitre the enemy's main position and to assemble for the attack.
Accordingly, the XXI Corps was to capture the line Umbrella
Rill-Shaikh Hasan, [see Map#2] on a front of 6,000 yards to a depth
of 3,000 yards. The 53rd Division, Camel Corps Brigade, and Anzac
Mounted Division occupied a line Bir Marrineh-Abu Jowal on November
1st. At 2300 hours on this day the 156th Brigade captured Umbrella
Hill. By 0300 hours on November 2nd the 161st and 162nd Brigades
attacked on a front of 6,000 yards, and by 0630 hours had reached
Shaikh Hasan.
The Turks had lost heavily during our preliminary bombardment of
Gaza and its vicinity since October 26th, and in consequence these
attacks on November 1st and 2nd were carried out with little loss.
During these days, however, the Turks were preparing for a
counter-stroke north of Beersheba.
On November 3rd the 53rd Division moved towards Khuweilfeh
Hill [Map#3]. Here strong opposition was encountered from three
cavalry regiments and eight battalions. The Turks continued their
attacks throughout November 4th and 5th in their attempt to drive
back our covering force on Beersheba, and to induce the
Commander-in-Chief to alter his plans and to make his main attack
against them in the Hebron Hills. The Commander-in-Chief however
continued with the plans and preparations for his main objective,
which was to attack the enemy in the Sheria-Hureira position on
November 6th. In this connection the Commander-in-Chief writes in
his despatches: 'Had the enemy succeeded in drawing considerable
forces against him in that area the result might easily have been an
indecisive fight, and my own striking force would probably have been
made too weak effectively to break the enemy's centre in the
neighbourhood of Sheria and Hureira [about 8 miles north west of
Beersheba. Map#3]. However, the enemy's action was not allowed to
make any essential modification to the original plan.'
General Barrow was given command of the right flank guard during the
main attack. His force consisted of the 53rd Division with the Camel
Corps Brigade, the Yeomanry Division, the New Zealand and 2nd
Australian Light Horse Brigades. This force maintained its position,
and when the
60th Division successfully attacked the Turks' entrenched position at
Sheria the enemy had no reserves left to re-establish the situation,
and, in consequence on November 7th their whole defence collapsed. By
nightfall on this day only their troops in the Atawineh works still
held out . It had, however, been hoped that Sheria and the water in
the Wadi would have been captured on November 6th. But the 6oth
Division was unable to do this. One brigade of the 10th Division was
able to advance to within a mile of Hureira. The remainder of the
division remained cast of the Sheria-Beersheba railway. The 74th
Division was a mile north-east of the 10th Division by the evening of
November 6th. On that night the 75th Division captured Outpost and
Middlesex Hills at 2330 hours and Turtle Hill at 0500 hours on the
next day. Only the troops in the Atawineh works still held out. Also,
early on November 7th, the 10th Division captured Hureira, and the
6oth Division after capturing Tel el Sheria, advanced two miles
beyond the Wadi Sharia. The cavalry now passed through the infantry
to join up with the XXI Corps and to prevent the Turks at Atawineh
from escaping north. Owing, however, to the difficulties of water
supply the mounted troops became widely distributed when the
opportunity for pursuit arrived. and so the bulk of the Turkish 26th
and 54th Divisions gained a position north of the Wadi Hesi before
the Desert Mounted Corps was able to join up with the XXI Corps.
The Turkish retreat, however, was energetically followed up by the
60th Division as far as Huj. The 54th Division advanced through Gaza,
and north-west of it through Sheikh Redwan to the sea, the Imperial
Service Cavalry Brigade advanced up to Beit Hanun, and the 52nd
Division advanced up the sea coast past the 54th Division to the Wadi
Hesi.
The Turks had thus been successfully driven from their naturally
strong position which they had been fortifying since the first battle
of Gaza.
The Commander-in-Chief gives full credit to the preparations which
had made this feat possible. In his despatch of June 28th, 1919, he
wrote: "I desire to express my indebtedness to my predecessor, who,
by his bridging of the desert between Egypt and Palestine, laid the
foundations for the subsequent advances of the Egyptian Expeditionary
Force. The organization he created, both in Sinai and in Egypt, stood
all tests and formed the corner-stone of my successes."
|
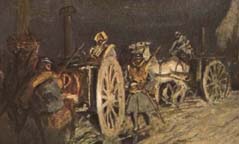 WWI Resource Centre
![[WWI map:The Advance by the Turks on the Suez Canal, 1915]](http://www.vlib.us/wwi/resources/images/britturksmap1.jpg)
![[WWI map: Gaza Battlefields, March 26 and April 19, 1917]](http://www.vlib.us/wwi/resources/images/britturksmap2.jpg)
![[WWI map: Gaza Battlefields, March 26 and April 19, 1917]](http://www.vlib.us/wwi/resources/images/britturksmap3.jpg)